
Restore Orchestration with a Commvault Workflow
In a previous post I discussed Commvault Workflows as they can be a powerful tool to extend the capabilities of your CommCell. They can be used to orchestrate complex sequences that would be difficult otherwise. A basic example of how a workflow can be used to extend non-native capabilities would be a sequenced restore. For example, we have two servers in which server 1 must be restored successfully before the restore of server 2 begins. So let’s create a workflow to accomplish this!
I won’t detail how to create a new workflow and the associated requirements as they are fairly straight-forward. More detail can be found at the Commvault documentation site
You can download the workflow here
In a high-level overview we want our workflow to accomplish the following.
- Restore server 1 and wait until it completes.
- If the restore of server 1 completes successfully then restore server 2.
- If the restore of server 1 fails end the workflow and send an email to the admin.
- Restore server 2 and apply same logic in step 3
- If restore job 2 is successful email admin notifying of success and end workflow.
The completed workflow. See figure 1.
figure 1:

Steps to Complete
-
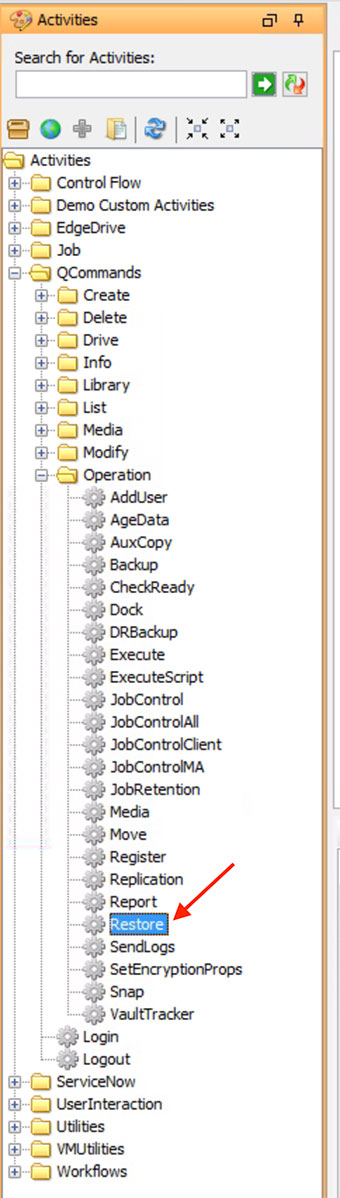
The first item to add is a restore Activity which is located in Activities > QCommands > Operation > Restore as in figure 2.
figure 2:
-
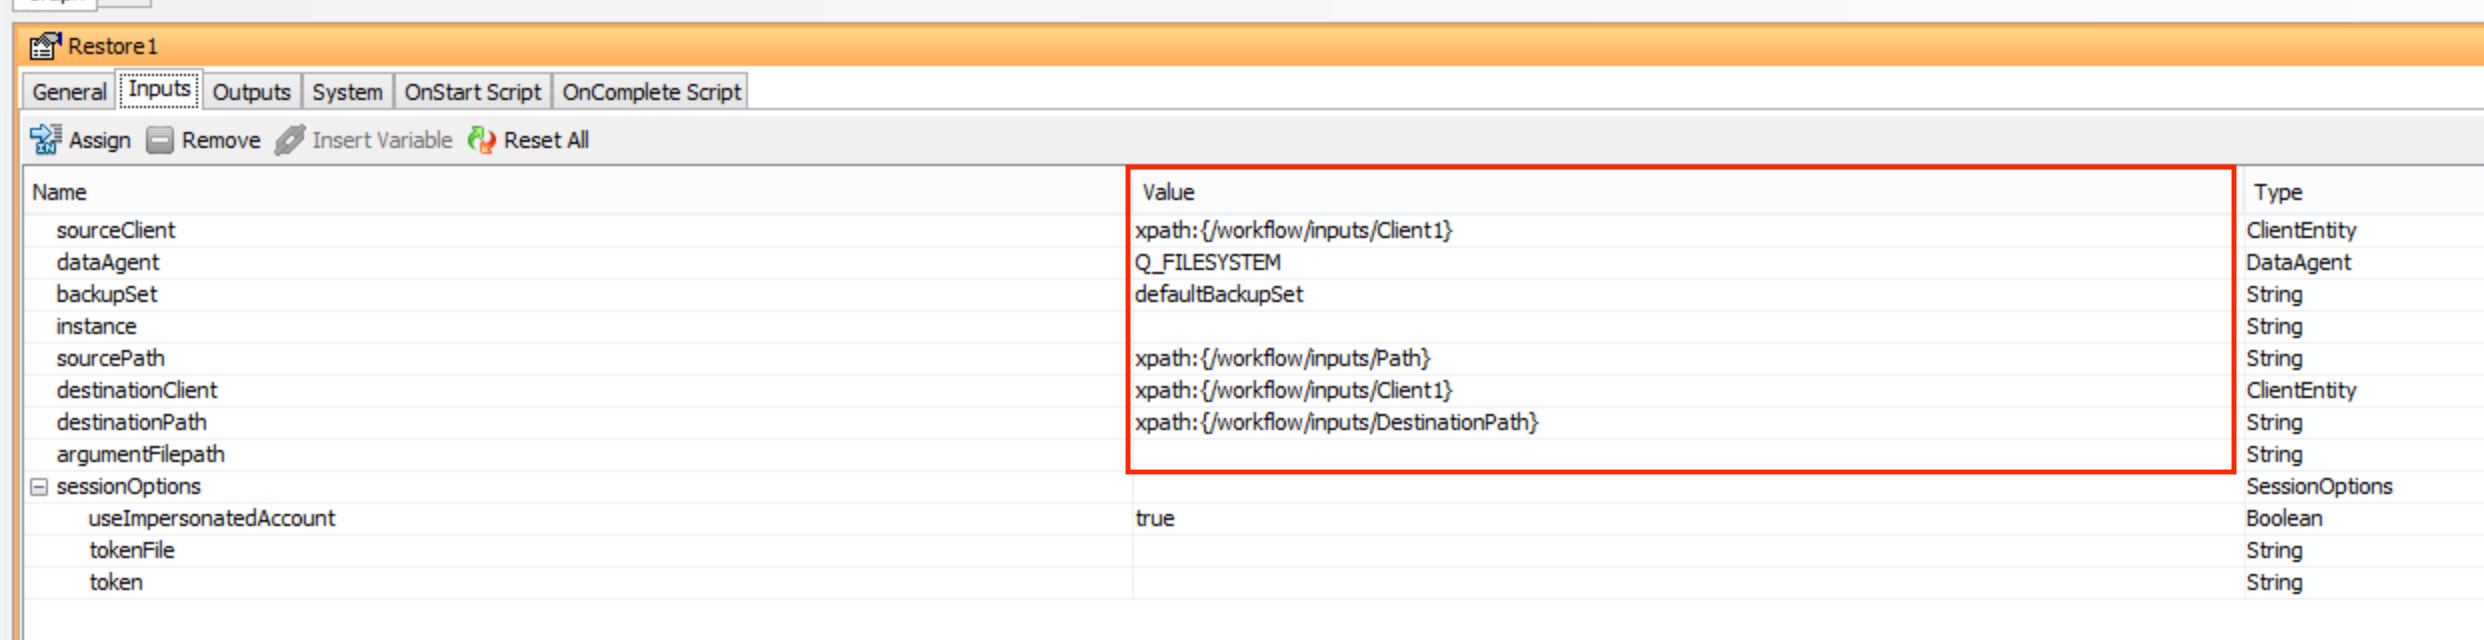
Once added we need to define the input variables such as the client and data to be restored as well as the type of data. The options for this are presented by selecting the restore object we just added and navigating below to the Properties pane. We have some options here not only in the data values but also in how we input the values. One option would be to directly add the values such as the client objects and paths such as in figure 3 and this makes sense when the same servers and data paths are always used. However, we may want to allow the user to specify these values at runtime which can be accomplished by specifying the values as shown in figure 4. These values are direct references to user input fields that can be added to the workflow and referenced throughout. Lastly, the data type is file data and as such we select Q_FILESYSTEM.
figure 3:
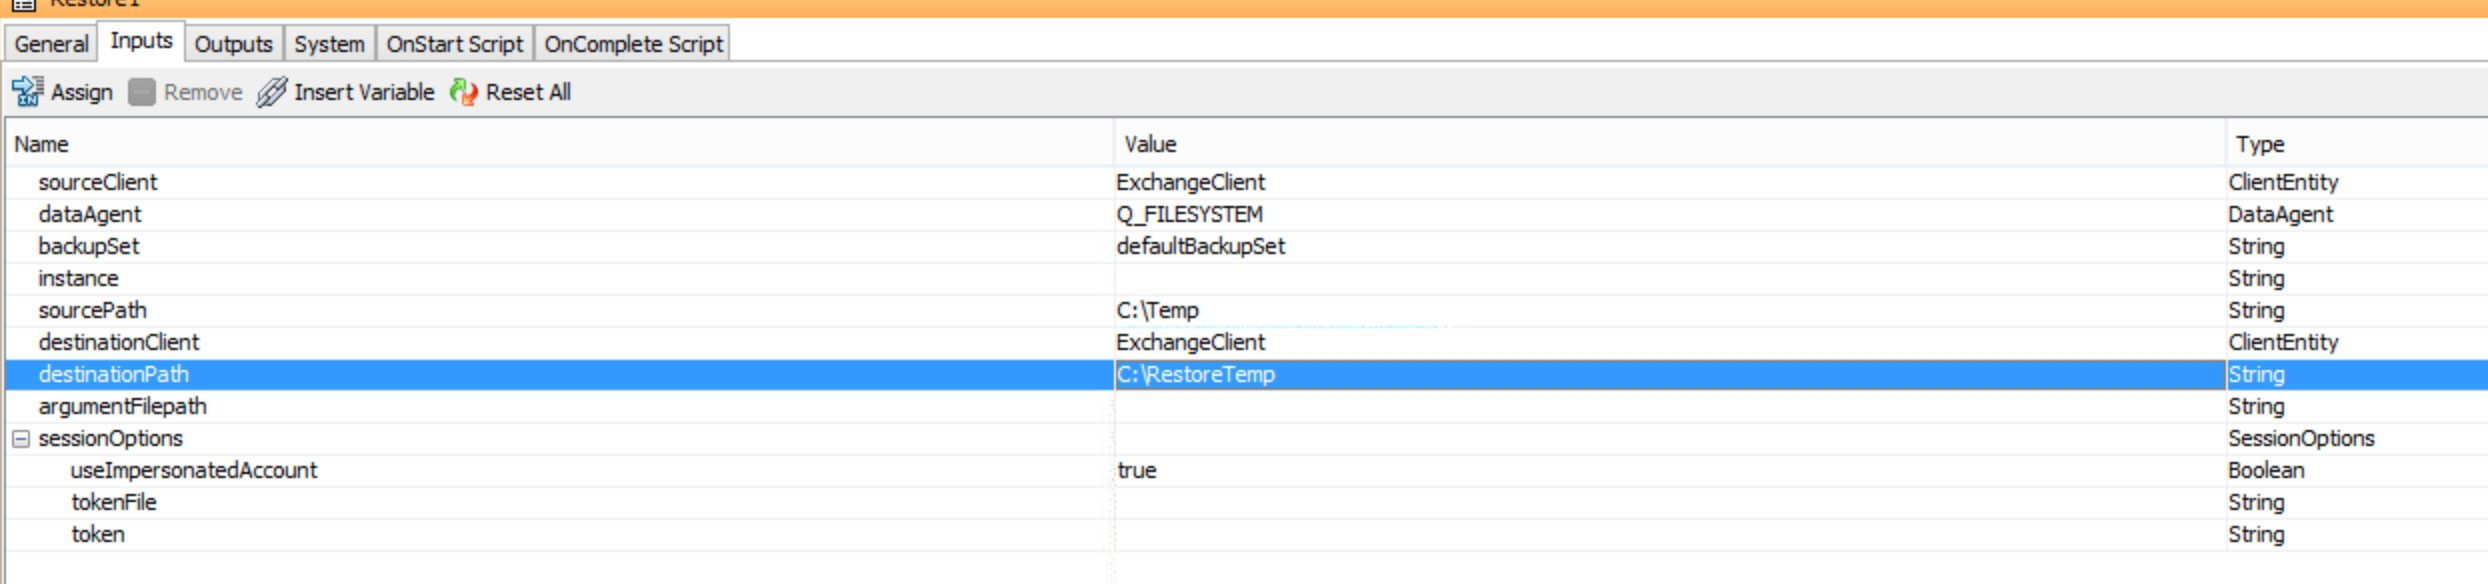
figure 4:
-
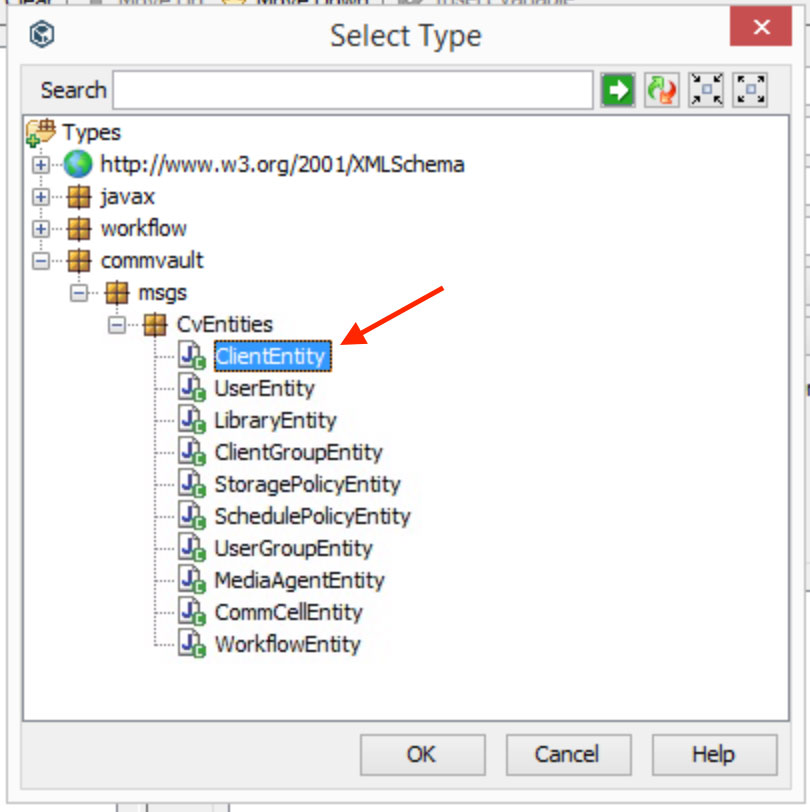
To allow the user to input the servers to be restored along with the data path to be restored and where to restore it to we need to add input fields. With two (2) servers this will total six (6) input fields. To complete this select an open area in the workflow to ensure the workflow is selected and not one of the items within it. Right-click and then select properties. In the properties window, as in figure 5, select the inputs tab > data tab. Click + Add to add a client entity which is a Commvault object that represents a client in Commvault as in figures 6 and 7. This will allow the user to select the first client to restore.
figure 5:
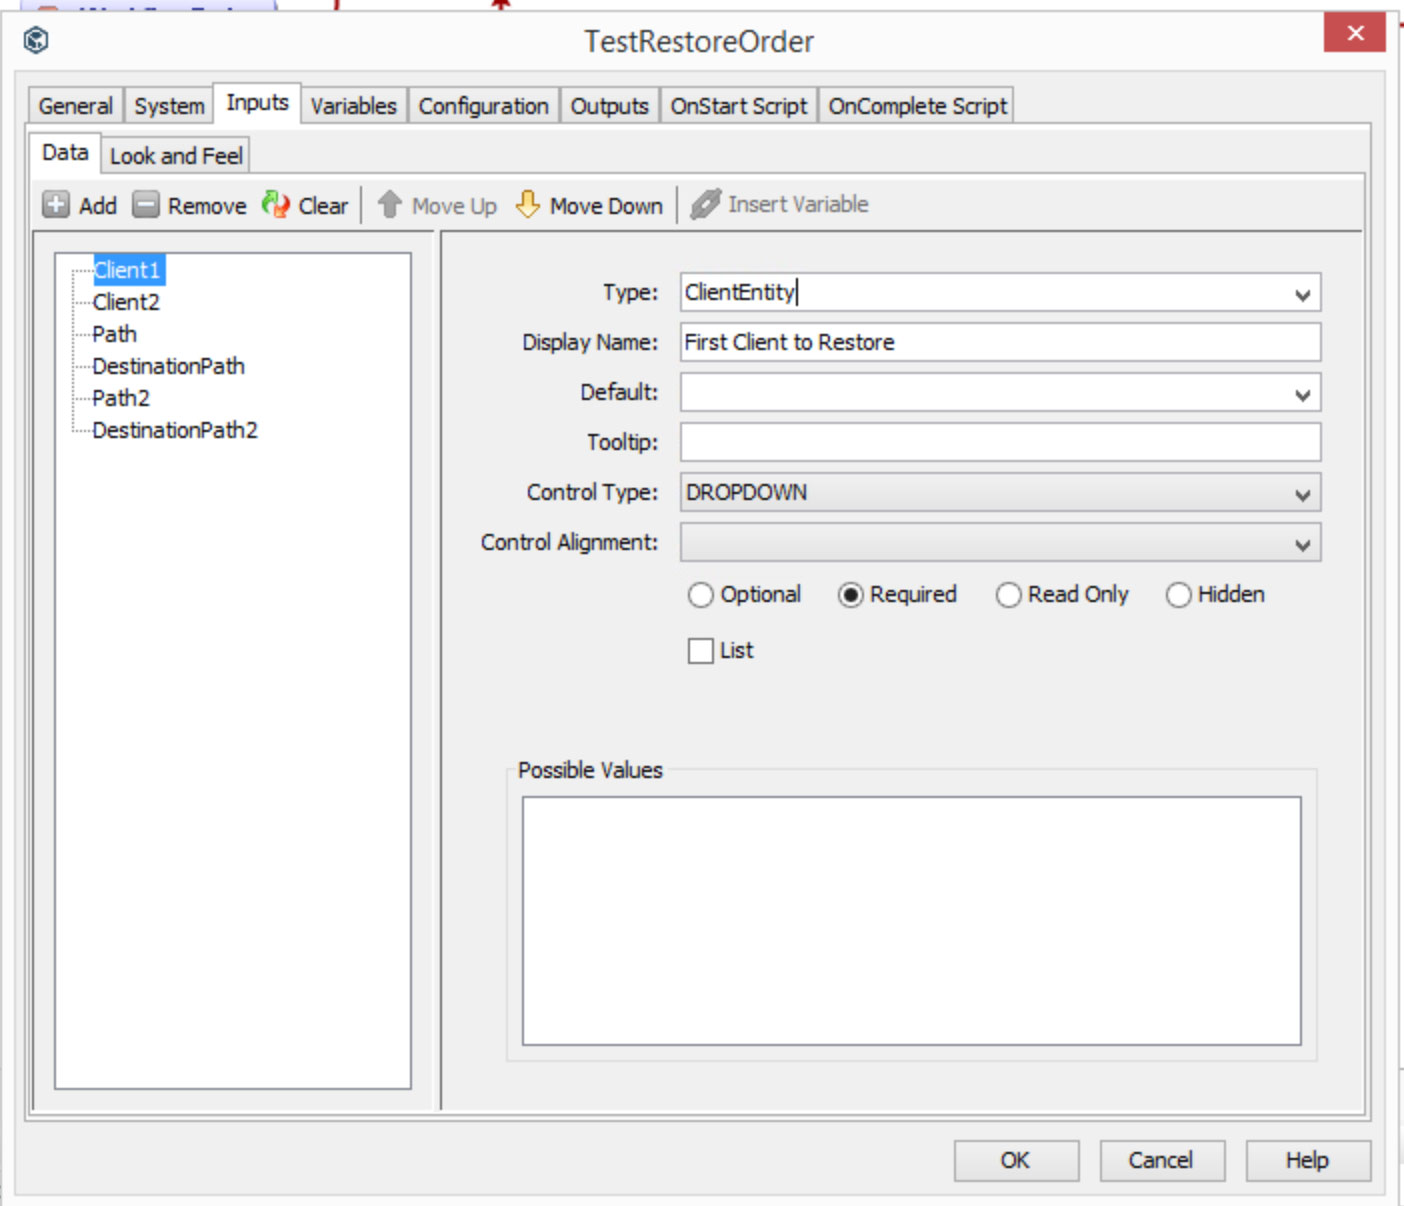
figure 6:
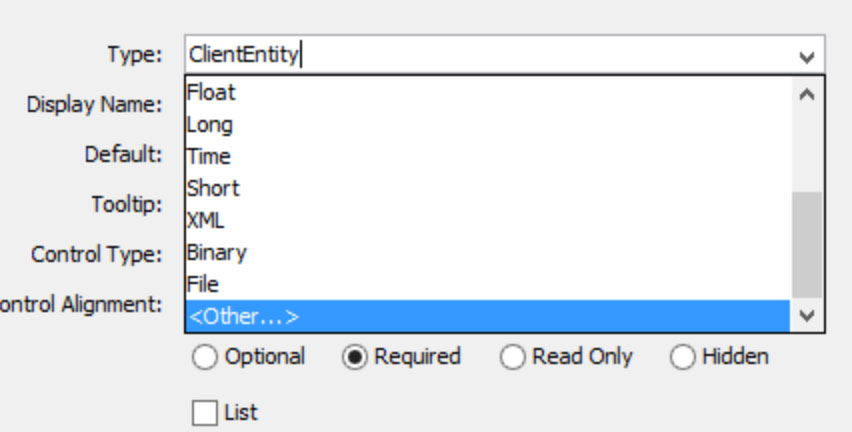
figure 7:
-
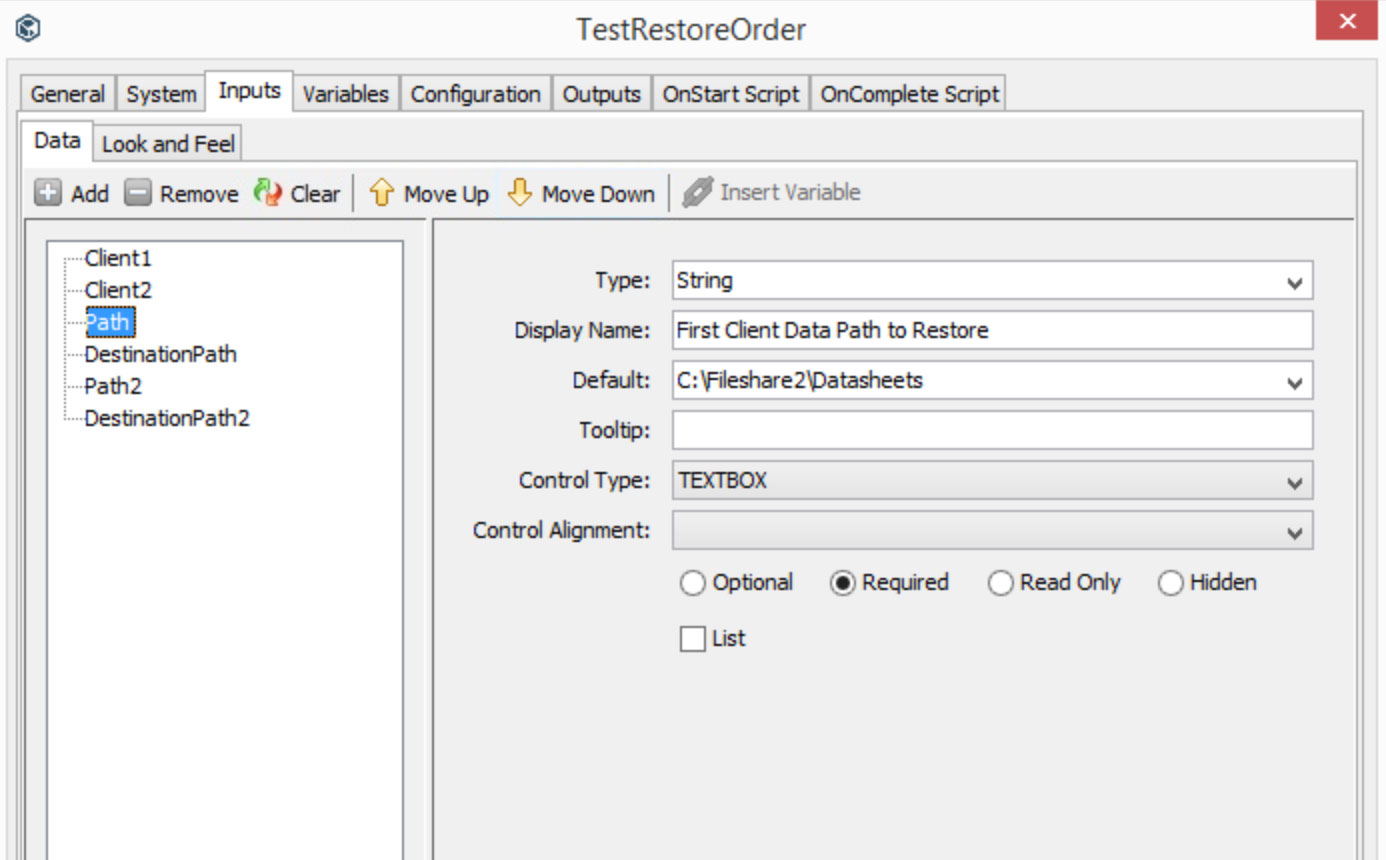
After adding the field allowing the user to enter the first client to be restored, we need to add two more fields to allow the user to enter the path of the data to be restored and the path for the data to be restored to. These are simply string fields as in figure 8. I also included a default path to make testing faster. This brings us to a total of three (3) fields. We just need to duplicate what we did for the second client just modifying the variable names. It should be noted, that we could have limited this field to one path which would have limited the user from entering an out-of-place restore location but would have also reduced the number of fields presented. This is essentially what we did with the client field since a destination client is not an option and variable xpath:{/worfkflow/inputs/Client1} is referenced as the value for both the variables, sourceClient and destinationClient.
figure 8:
-
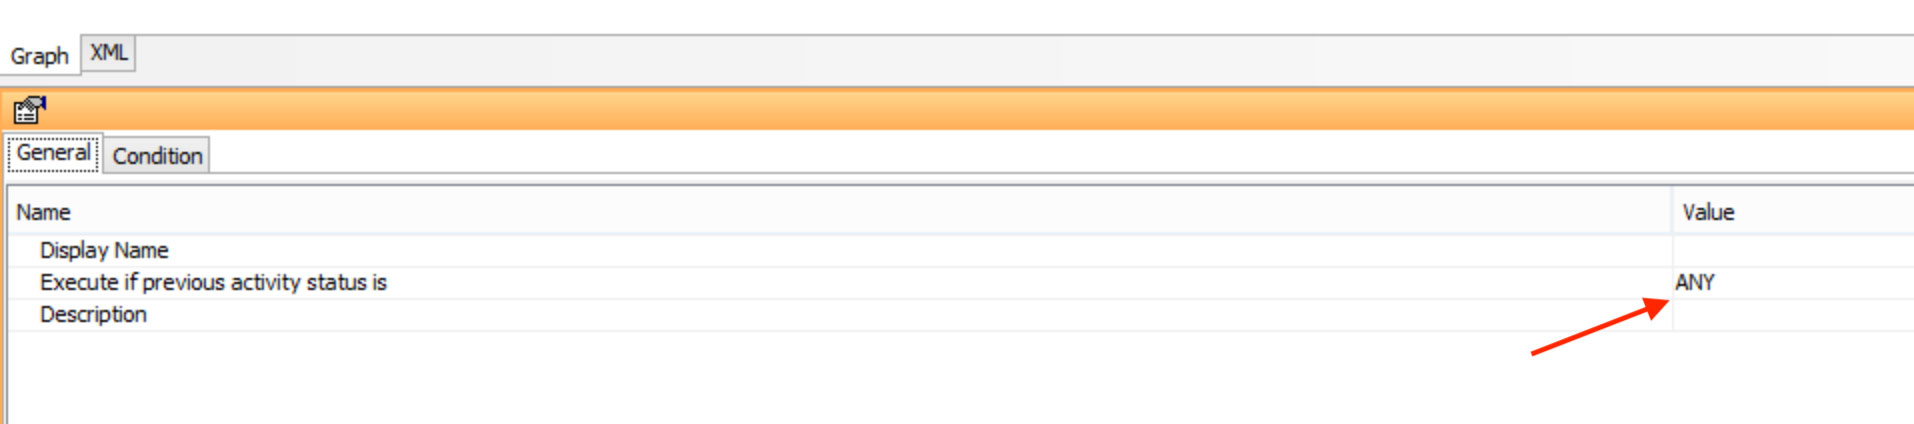
Now that we have our input variables set, the next step would be to ensure the job completes before moving on to the next restore. If it fails then this will get passed through as well and we will need to handle. To do this we add Activities > Job > WaitForJobCompletion, by dragging it into our workflow. We now need to drag an Activity Connector from the Restore Activity to the WaitForJobCompletion Activity. The input of for the WaitForJobCompletion Activity should be the restore job as in figure 9. The Activity Connector should have the value of activity status set to ANY per figure 10. This is default as we want the results passed through regardless.
figure 9:
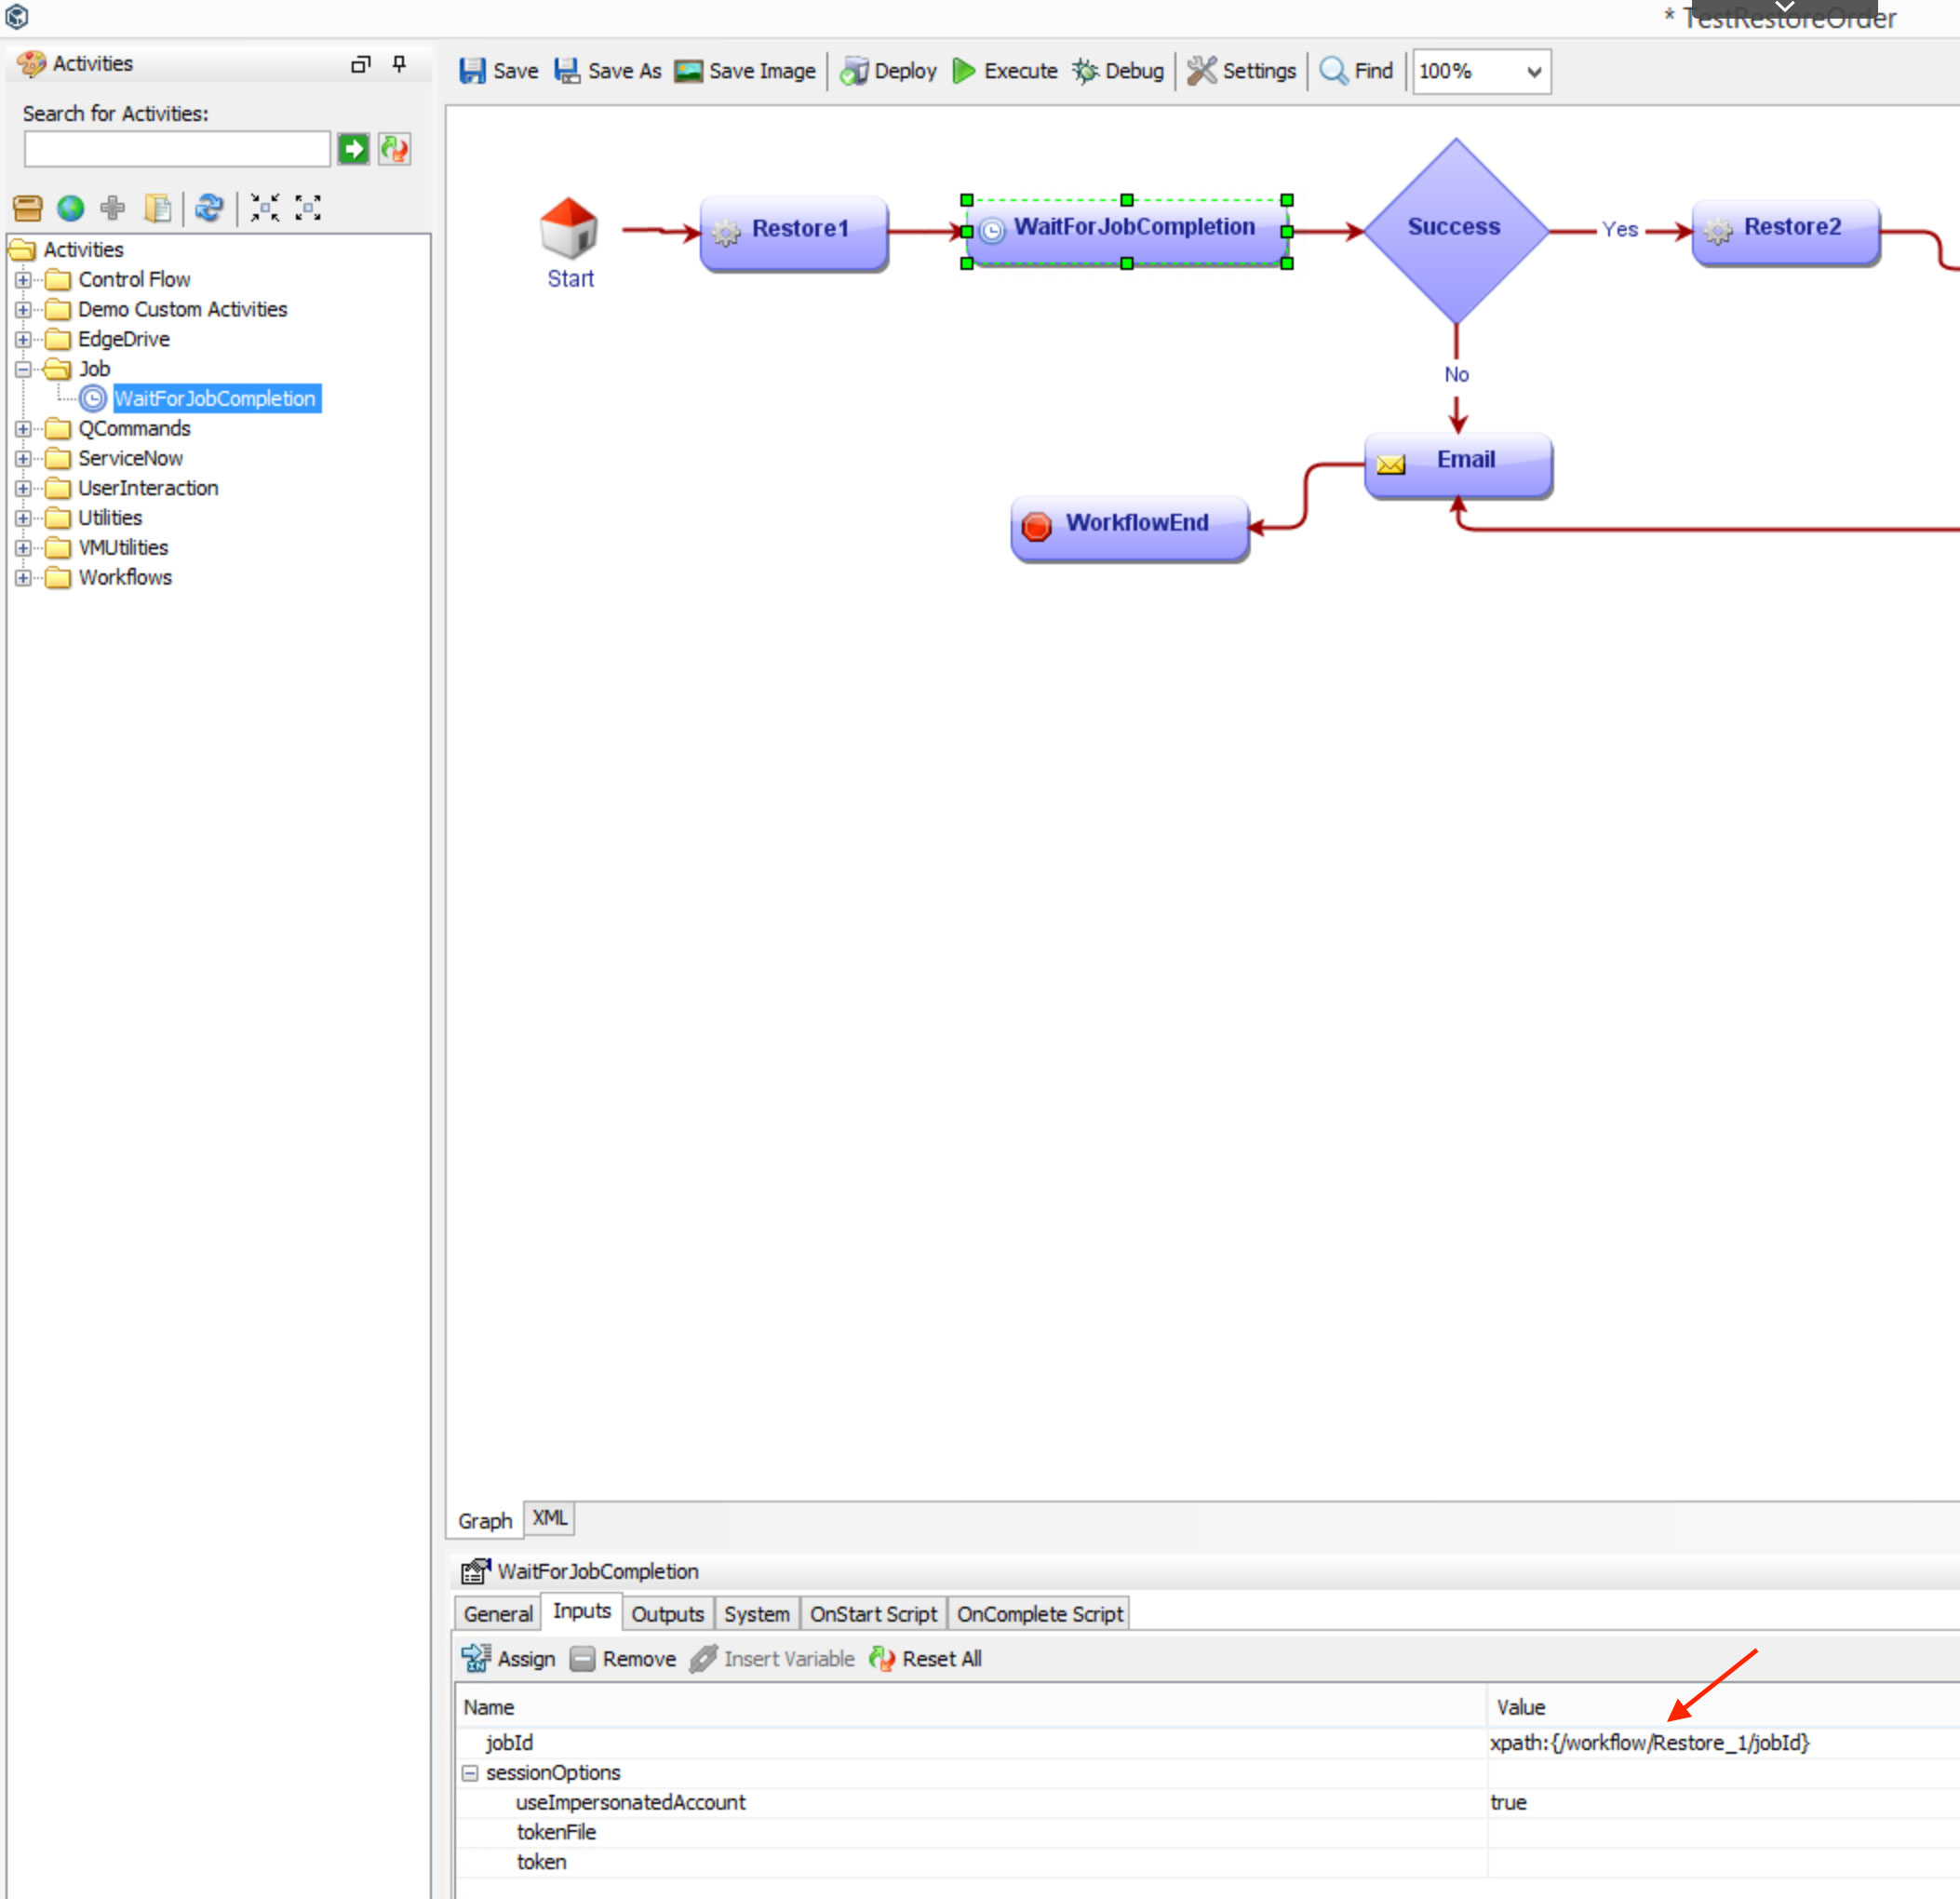
figure 10:
-
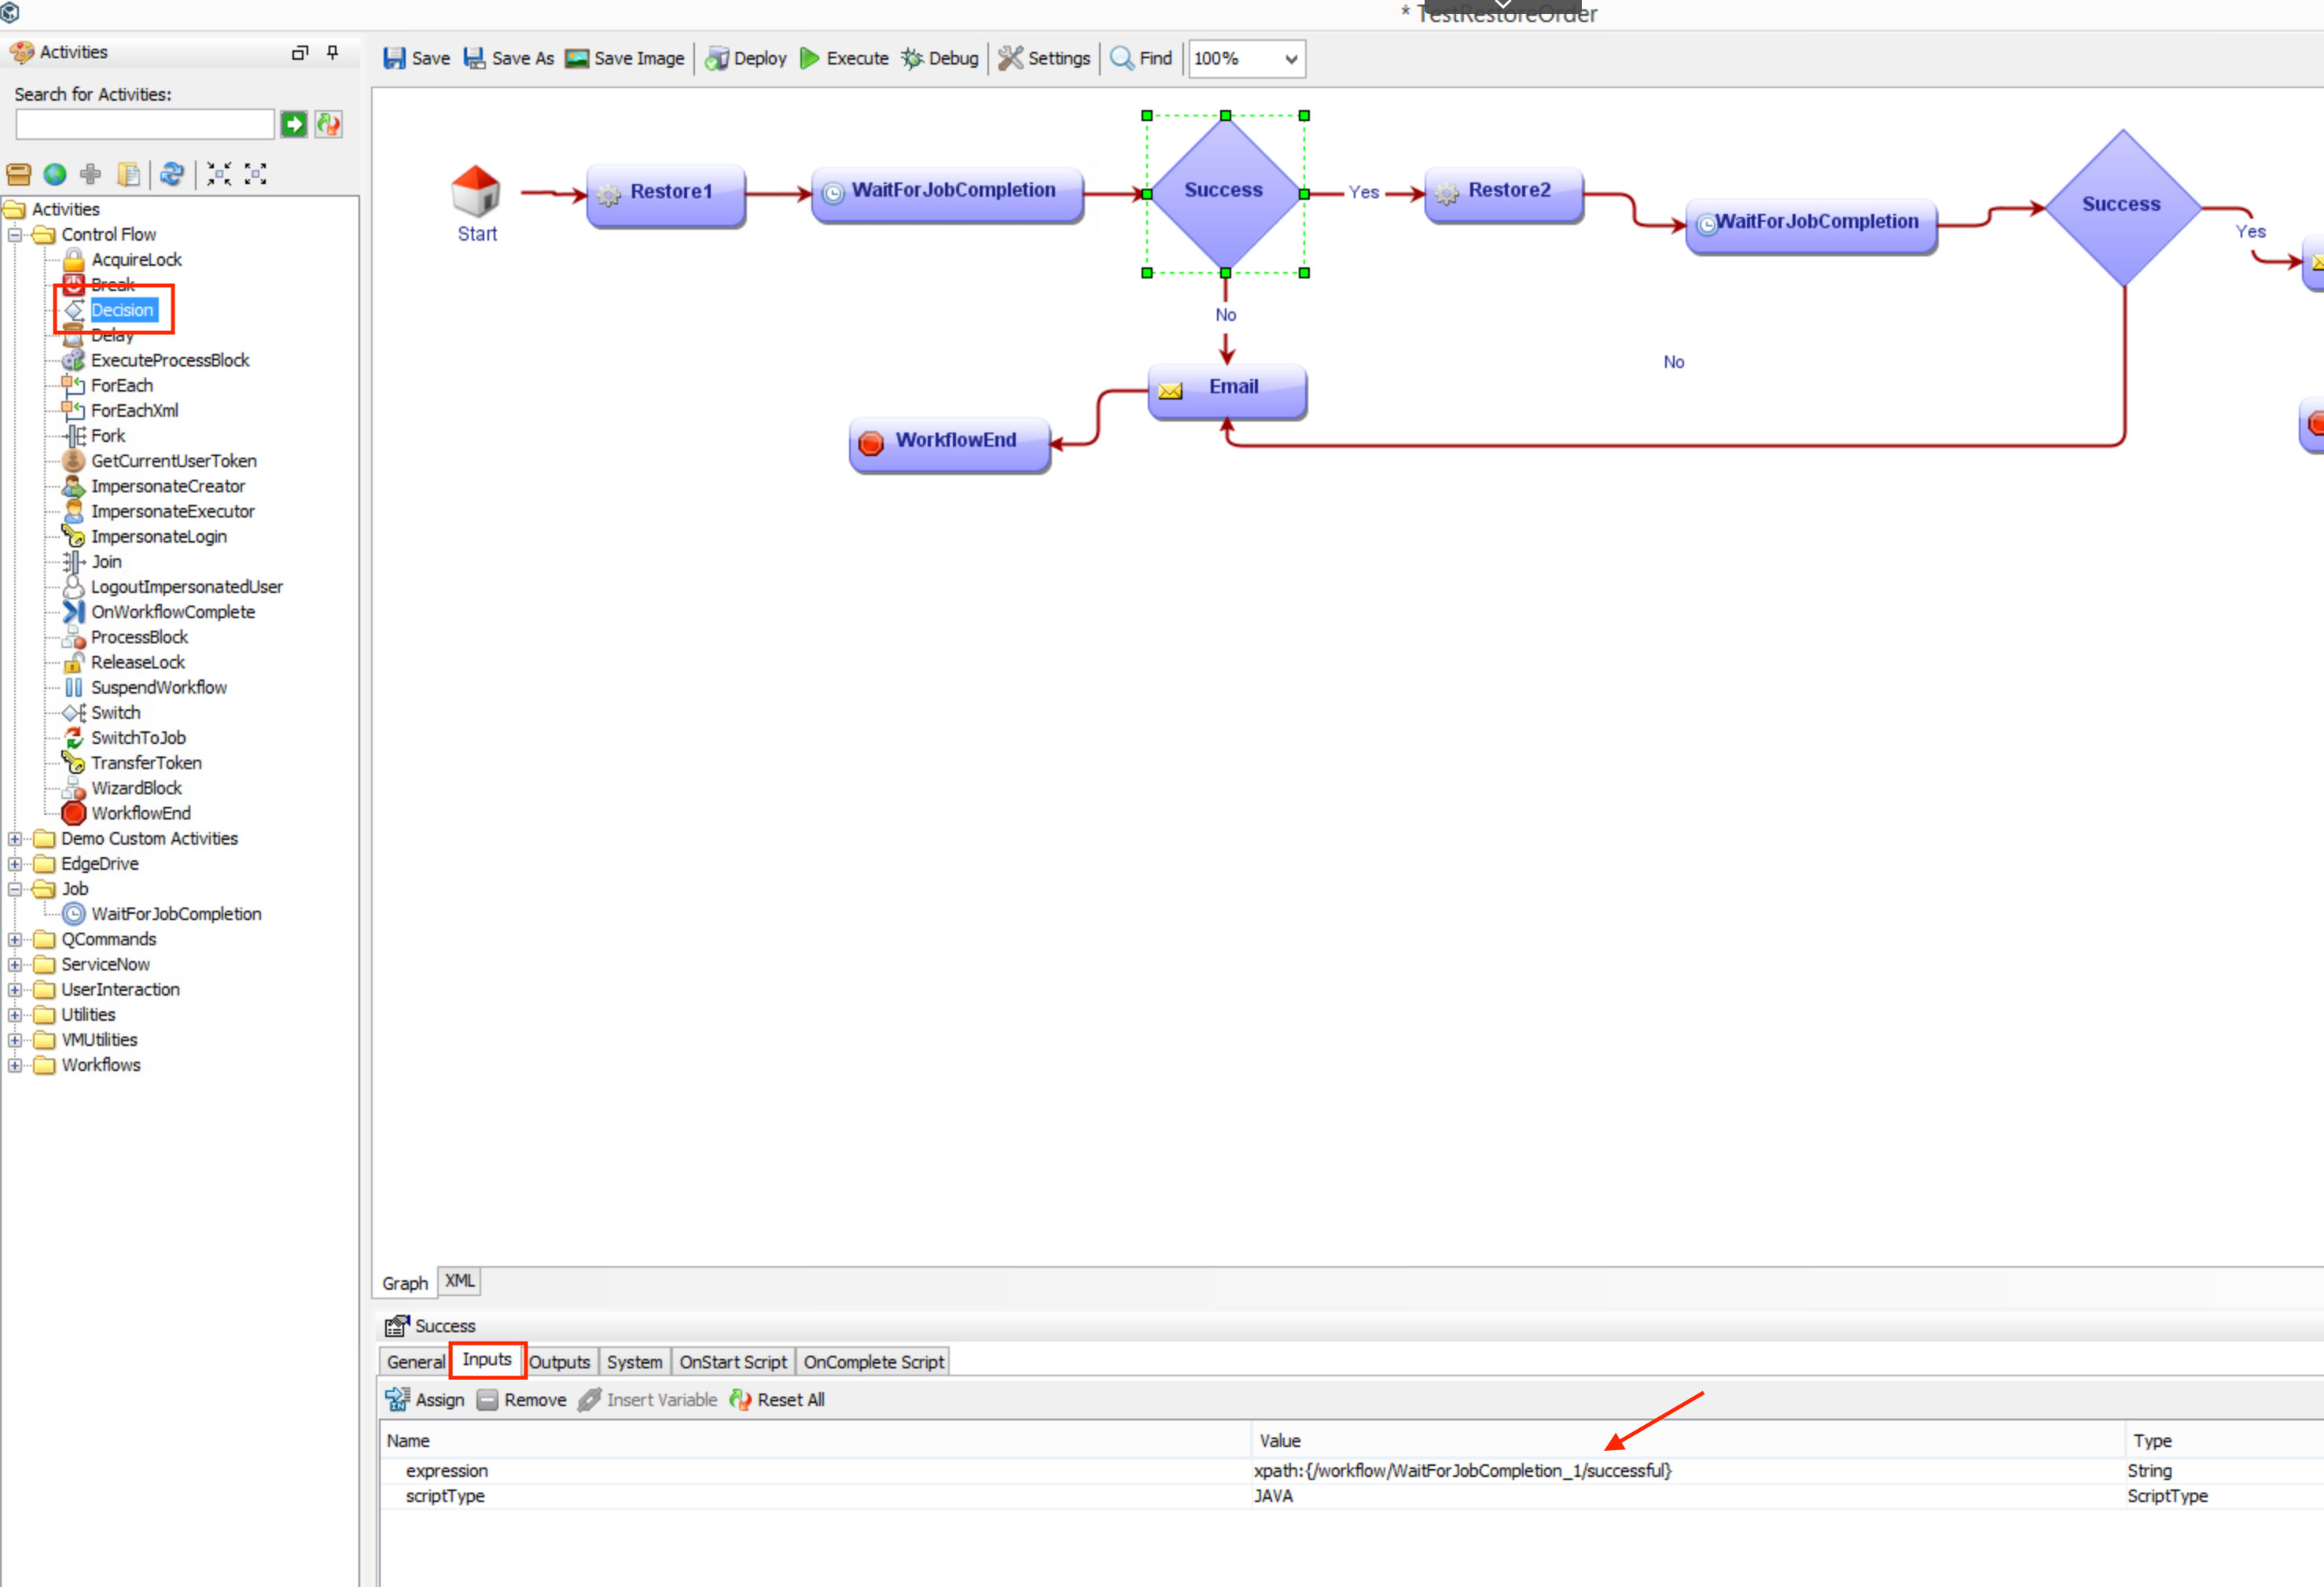
So now we have defined the first restore job and we will wait until it completes. However, there is the potential the job will fail and we will need to handle that to ensure the workflow ends and the second restore doesn’t occur. To do this we will add Activities > Control Flow > Decision to the workflow after the WaitForJobCompletion Activity and we will connect them. The Activity Connector between them will again be set to ANY but the Activity Connectors from the Decision Activity will either be true or false. The input of the Decision Activity needs to be set to xpath:{/workflow/WaitForJobCompletion_1/successful} as in figure 11. WaitForJobCompletion_1 indicates the unique name for the Activity.
figure 11:
-
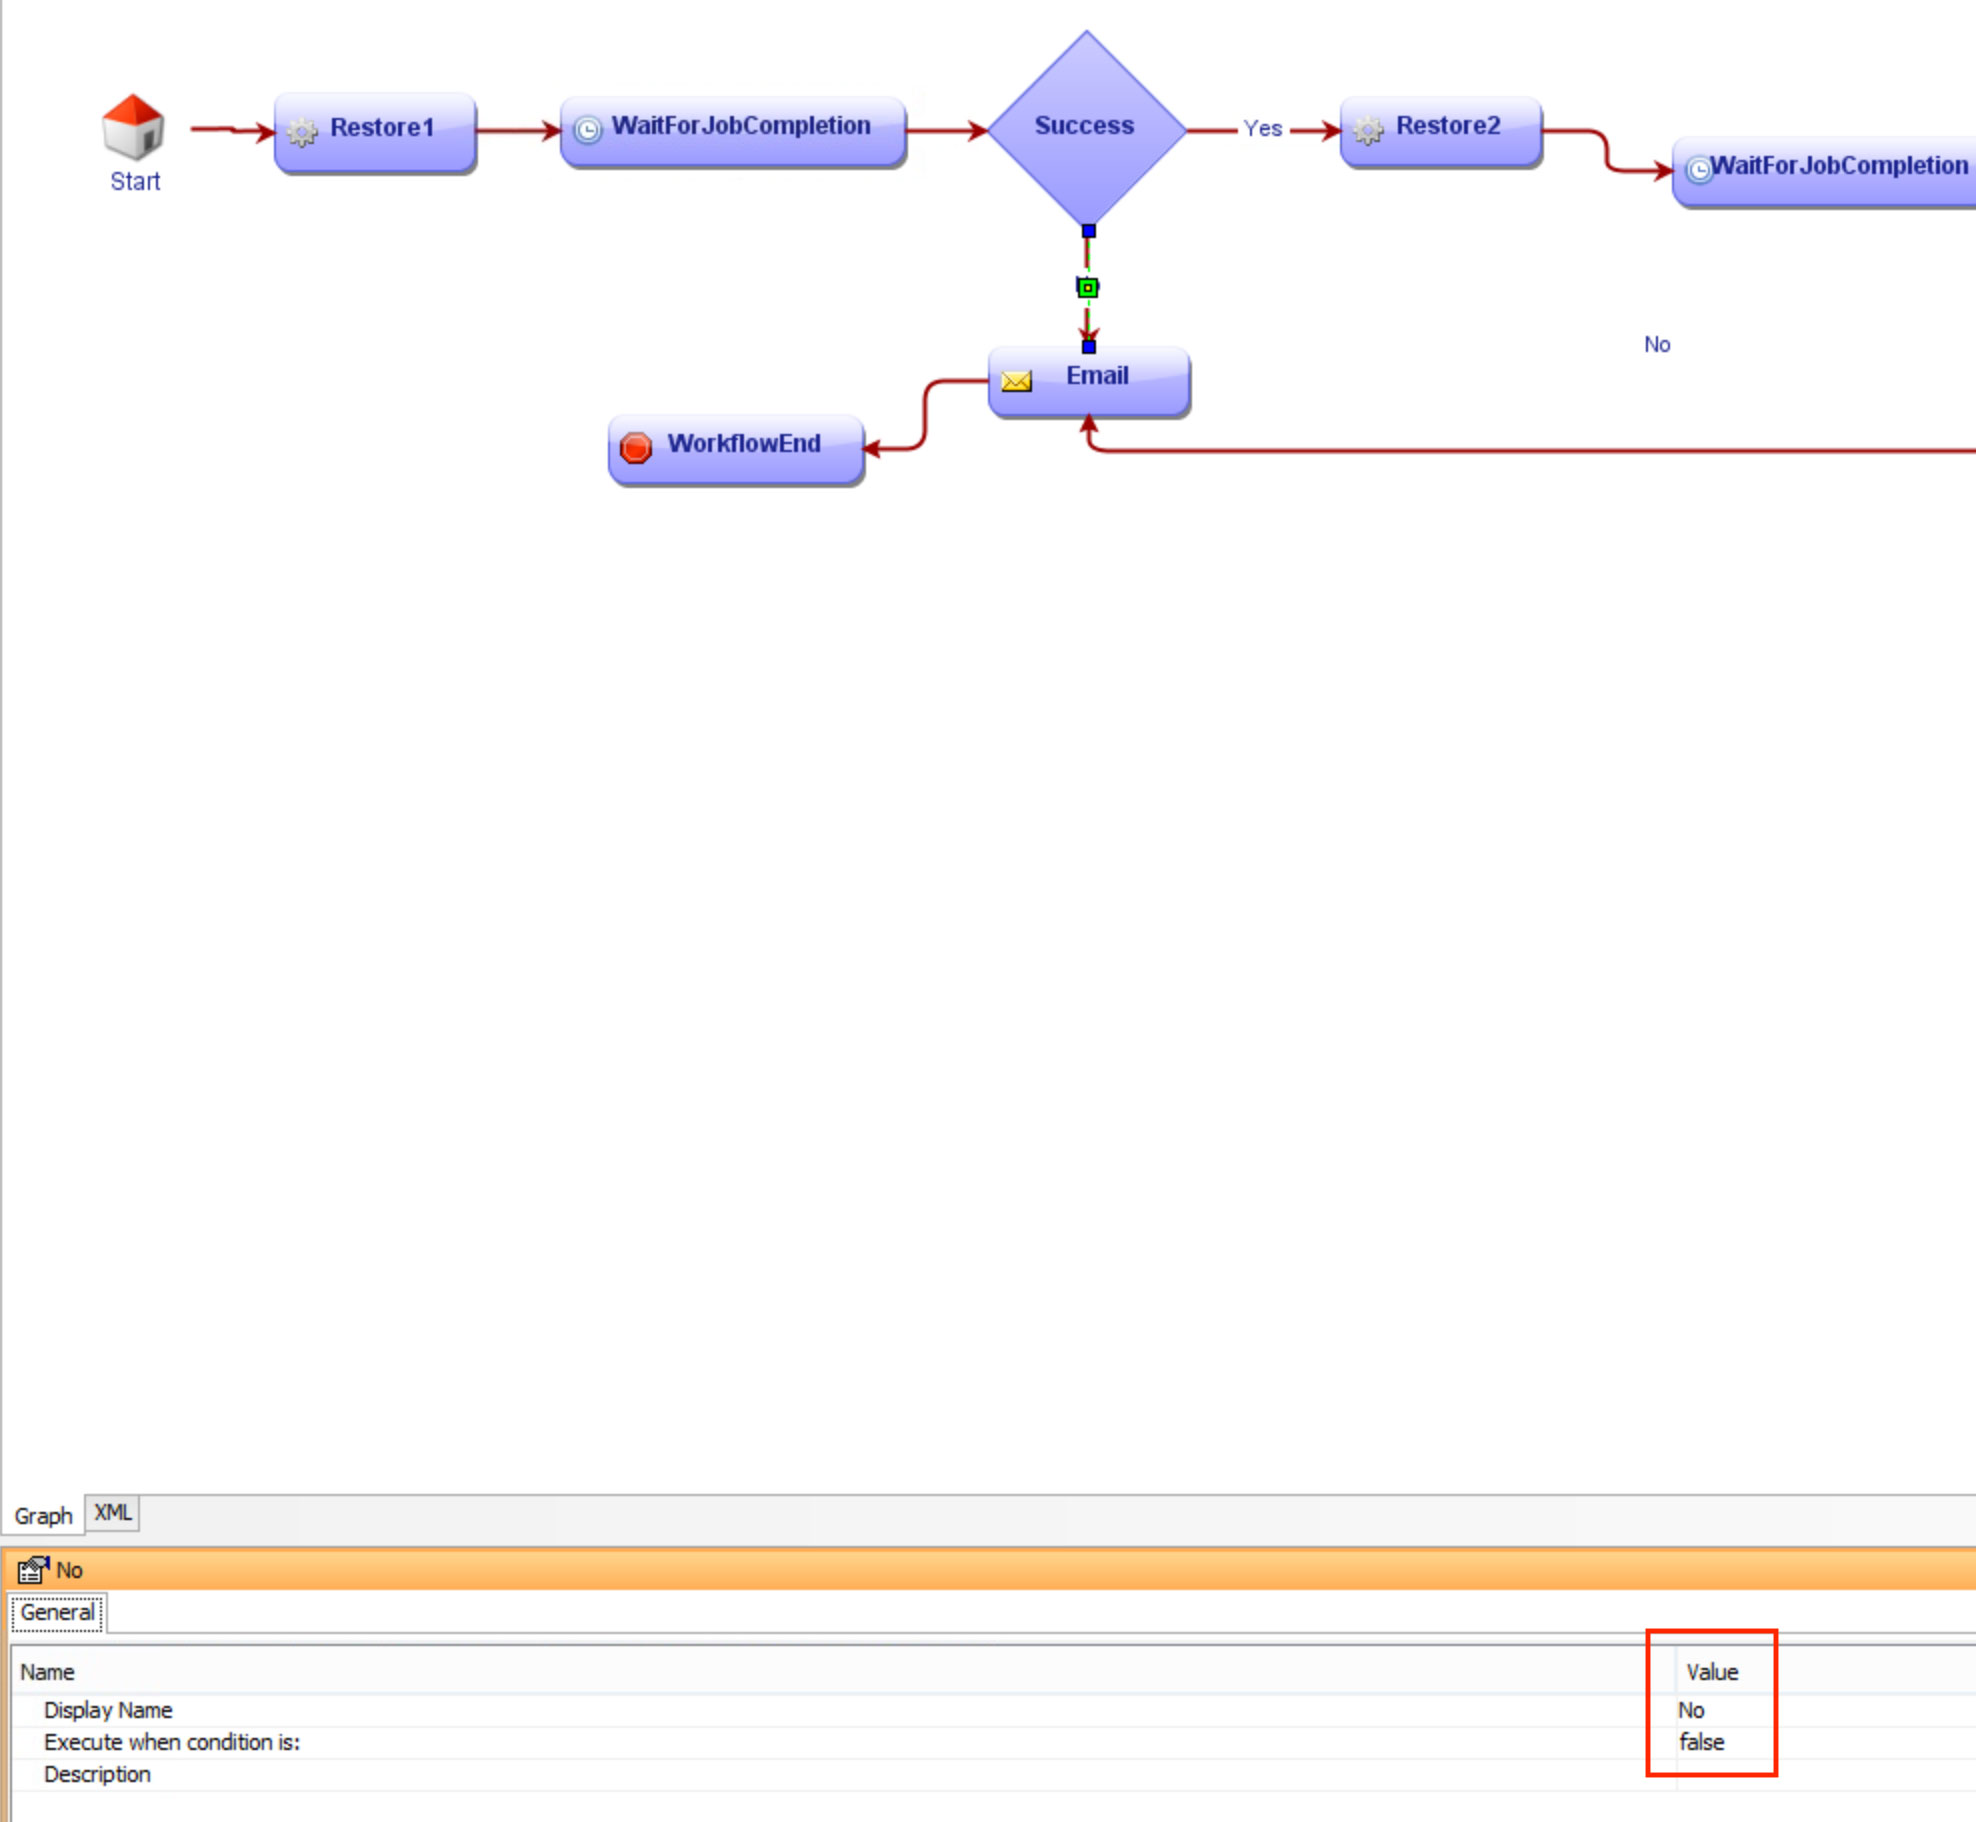
As I stated earlier we will define two Activity Connectors from the Decision Activity, defining what happens when the variable, xpath:{/workflow/WaitForJobCompletion_1/successful}, is either true or false. If it is false then the job has failed and we will send an administrator an email notifying of the first restore jobs failure and then end the workflow. If it is true then we will continue on with the next restore. To handle a failure we will add Activities > Utilities > Email and draw a connector from the Decision Activity. Right-click the connector we just added and modify the status to false and change the name to No to indicate failure as in figure 12.
figure 12:
-
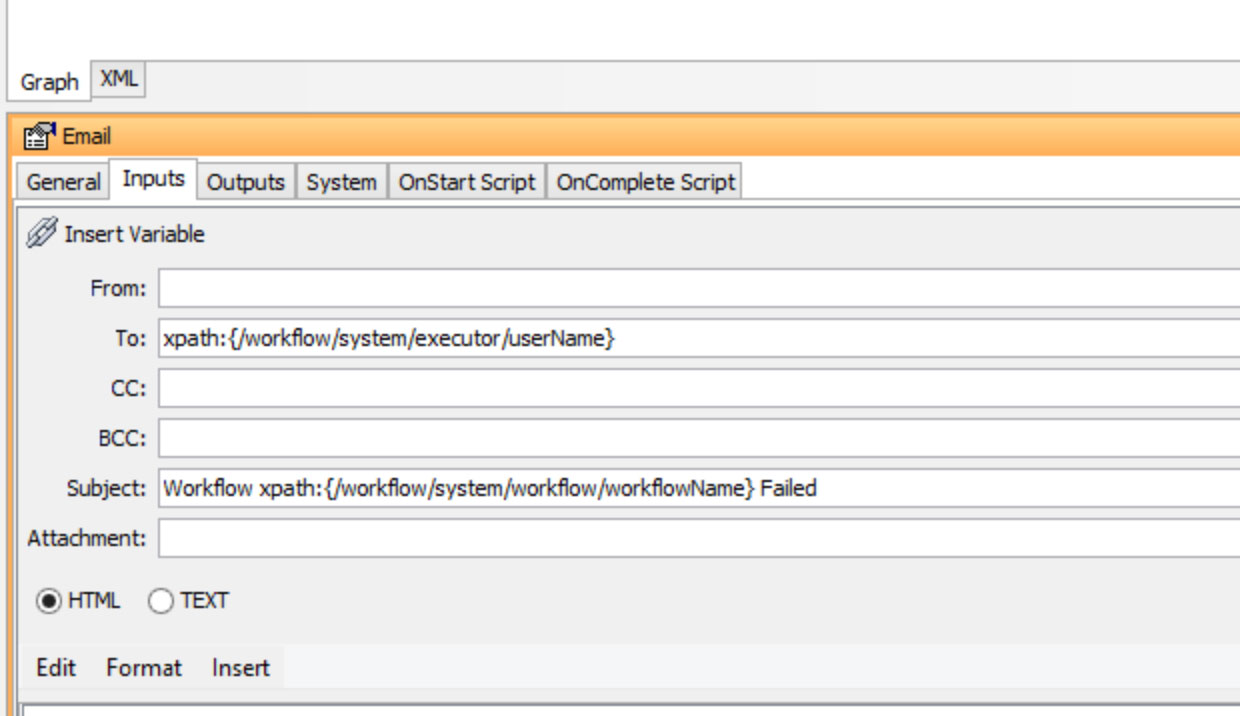
For the email activity we can hard-code the values such as the email address and subject but in this case we will utilize the email associated to the user logged into the CommCell and running the workflow. This is represented by the variable, xpath:{/workflow/system/executor/userName}. We will do something similar with the Subject field utilizing a system variable as can be seen in figure 13.
figure 13:
-
To complete handling of the failure of the first restore we will add a WorkflowEnd Activity and connect it to Email Activity. At this point if the job does not complete successfully an email will be sent to the logged in commcell user and the workflow will end.
-
If the restore job is successful then we will add another Activities > QCommands > Operation > Restore as in figure 2. We will then add a connector from the Decision Activity to it and modify it to execute when condition is true. We will also label it yes as in figure 14. You may have noticed I changed the Activities names to distinguish them and make it easier to view and read. Just double-clicking on the name of the activity allows for it to be changed. For example, changing the Decision Activity name to Success and then naming the outgoing connectors to No and Yes makes it much easier to read but is strictly speaking not necessary.
figure 14:

-
From this point on it we essentially repeat what we have already done for the second restore with the only difference being if the second restore is successful, then it will email the administrator notifying of success rather than starting restore 3. However, one could easily modify this to include more systems, hard-code their values, and include scripts to start/stop services, for example. The final step is to save/deploy and then run your workflow.
Well if you’ve made it all the way down that’s just swell. Now, go get yourself a hot water and take a walk or something like that.